Before we explain the individual functions of the editor, let's take a closer look at the editor itself. At first glance, it appears very minimalistic and hides various settings in collapsible sidebars.

The part of the editor that is always visible: the toolbar. It forms the upper edge of Gutenberg and contains some fundamental functions. Let's go through the bar from left to right.
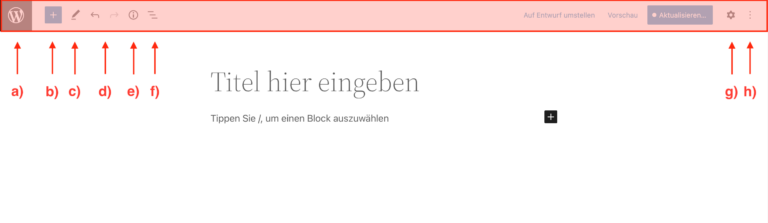
a) The WordPress icon in the top left corner takes you back to your dashboard.
b) The blue square with the plus sign in the middle opens the block inserter, which we will introduce in the next section.
c) The pencil icon allows you to switch between selecting and editing, but is pretty useless in practice.
d) The arrows for undo and redo are self-explanatory
e) The circled “i” provides useful details about your page, such as the current number of words or blocks.
f) The three lines next to it open a list view of your page – one block below the other. This view gives you a good overview, especially for pages with many elements.
g) and h) The two icons on the far right hide two more sidebars. While the gear icon opens block and page settings, the three dots lead to general settings where you can change the current view or show and hide certain elements.

The blue square in the toolbar takes you to the block inserter.
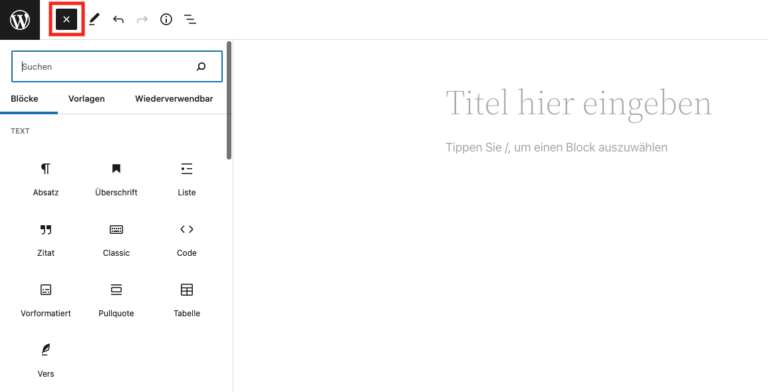
There, you can use three tabs to switch between a selection
of block types,
templates, and
reusable blocks.
With one click, these elements are added to the page—hence the name “Block Inserter.”