In the WordPress backend, you can easily create forms for all kinds of use cases. 
We use Gravity Forms, an efficient and user-friendly tool that we already worked with on the previous website.
Integrate a Form 📋
How to integrate a form in your page
What is Gravity Forms? 📋
Everything you need to know about Gravity Forms

Watch the video above for a quick run-through.
We recommend starting with the form templates and then customizing them to your needs.
Click on “Forms” in the Menu on the left side
Then again on “Forms”
Now you can find the list of all your forms and a button, “Create a form”
‘Steps are covered in the video above’

With an easy drag & drop system, you can add all kinds of different fields.
The most commonly used fields are already included and only need small adjustments.
To duplicate, delete, or move a field, hover over it and click the menu that appears. Hold the first icon (six dots) to drag the field to the position you want.
‘Steps are covered in the video below’
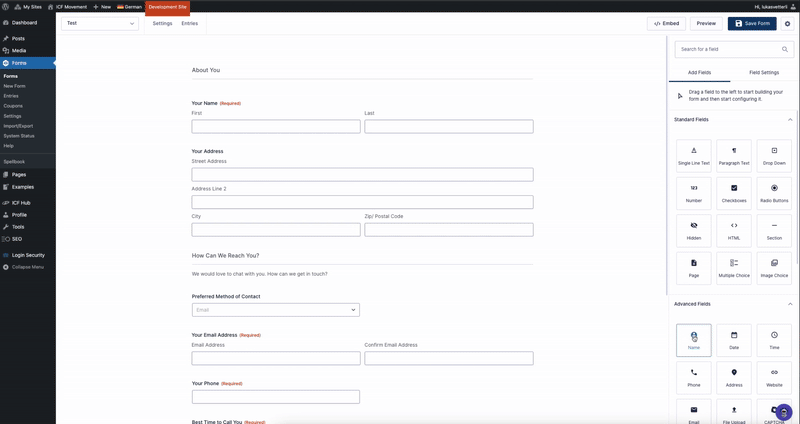

Use Sections to divide your form into parts, or add a Page Break if you want multiple steps. This helps keep everything clean and user-friendly.

Click Preview (top right) to check how your form will look on the frontend.

In the settings menu (top left) you can change the form name, add a description, or adjust the confirmation text after submission.